A Beginner’s Guide to Baking Bread at Home
Baking bread at home can seem intimidating, but with a basic understanding of the process and a reliable recipe, it becomes an accessible and rewarding activity. This guide walks you through the essential steps, from choosing the right flour to troubleshooting common problems. The focus is on explaining the methods and the reasoning behind them, so you can approach bread making with confidence and adapt to variations along the way.
Many factors influence the final loaf, including ingredient quality, room temperature, and technique. No single approach guarantees success, as outcomes depend on a combination of variables. However, learning the foundational principles—how flour, water, yeast, and salt interact—provides a solid framework for consistent results. Whether you are using a recipe from a cookbook or one shared by a friend, these principles remain the same.
In the United States, home bakers have access to a wide range of flours and yeasts, and understanding their differences can make the process smoother. This article is structured to guide you through each stage: selecting ingredients, mixing and kneading, proofing, shaping, and baking. Troubleshooting tips are included to help you diagnose and address issues that may arise. By the end, you will have a clear overview of the bread-making process and the knowledge to experiment thoughtfully.
Choosing the Right Flour and Ingredients
The type of flour you choose significantly affects the texture, flavor, and structure of your bread. In the United States, wheat flour is commonly classified by protein content: all-purpose flour, bread flour, and whole wheat flour are the most accessible. Bread flour has a higher protein content, typically around 12–14%, which promotes gluten development and gives bread a chewy, well-structured crumb. All-purpose flour, with about 10–12% protein, can also be used but may produce a slightly softer loaf. Whole wheat flour contains the entire wheat kernel, including the bran and germ, which adds fiber and a nutty flavor but can make the dough denser and require more water.
Beyond flour, yeast is the primary leavening agent. Active dry yeast and instant yeast are the most common types for home bakers. Active dry yeast requires proofing in warm water before use, while instant yeast can be mixed directly with dry ingredients. Both are reliable if stored properly and within their expiration date. Water should be free of chlorine and other chemicals that can inhibit yeast activity; filtered or bottled water is a good option. Salt is essential for flavor and also strengthens gluten, but it should be added in the right proportion—too much can slow fermentation, too little can leave the dough slack.
Optional ingredients such as sugar, oil, or milk can alter the bread’s characteristics. Sugar provides food for yeast and can speed up fermentation, while oil or butter adds tenderness and extends shelf life. Milk contributes to a softer crust and a richer flavor. When using a recipe, it’s best to follow the ingredient list closely the first time, then adjust based on your preferences and observations. Remember that ingredient substitutions can change the dough’s behavior, so make changes gradually and note the results.
- All-purpose flour: Versatile, moderate protein, good for beginners.
- Bread flour: High protein, ideal for yeast breads with a chewy texture.
- Whole wheat flour: Adds fiber and flavor, but often needs extra water and may require blending with bread flour.
- Yeast: Check expiration date; store in a cool, dry place or refrigerator.
- Water: Chlorine-free; temperature should be around 100–110°F for active dry yeast.
- Salt: Use non-iodized salt to avoid potential yeast inhibition.
Mixing and Kneading Techniques
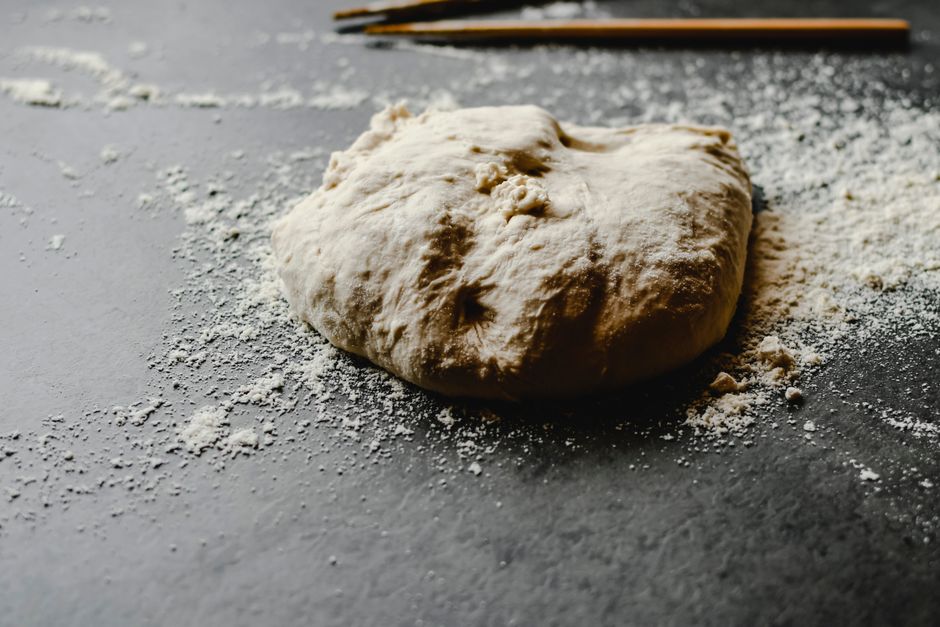
Mixing combines the ingredients into a cohesive dough, while kneading develops the gluten network that gives bread its structure. You can mix by hand or with a stand mixer. By hand, start by stirring the ingredients in a large bowl until a shaggy mass forms, then turn it out onto a lightly floured surface. Kneading involves pushing the dough away with the heel of your hand, folding it back, and rotating it a quarter turn. This action stretches and aligns the gluten strands. The process typically takes 8–10 minutes by hand, or 5–7 minutes with a dough hook on medium speed. The dough is ready when it is smooth, elastic, and slightly tacky but not sticky.
If the dough is too sticky, add flour a tablespoon at a time; if it’s too dry, add water a teaspoon at a time. Resist the urge to add large amounts of either at once, as small adjustments are easier to correct. Over-kneading can make the dough tough, while under-kneading leaves it slack and unable to hold gas. A windowpane test—stretching a small piece of dough until it’s thin enough to see light through—can indicate sufficient gluten development. However, this test is not definitive; experience and observation of the dough’s behavior are equally important.
For beginners, an autolyse rest—mixing flour and water and letting it sit for 20–30 minutes before adding yeast and salt—can make kneading easier by allowing the flour to hydrate fully. This step is optional but can improve dough extensibility. Some recipes also use a preferment, such as a poolish or biga, to enhance flavor and dough strength, but these are advanced techniques. As you gain confidence, you can explore these methods. For now, focus on mastering the basic mix and knead.
“The dough should feel like a soft earlobe when pressed—neither too firm nor too slack.” — A common guideline among bakers, though individual perception varies.
Proofing: Letting the Dough Rise
Proofing, or fermentation, is the stage where yeast consumes sugars and produces carbon dioxide, causing the dough to rise. The first rise, also called bulk fermentation, typically occurs in a lightly oiled bowl covered with a damp cloth or plastic wrap. The ideal environment is warm and draft-free, around 75–80°F. At this temperature, the dough may double in size in 1–2 hours, depending on the recipe and yeast type. However, time is not a reliable indicator; the dough’s visual and tactile cues matter more. It should look puffy and have visible bubbles on the surface. A gentle press with a floured finger should leave an indentation that springs back slowly—if it springs back immediately, it needs more time; if it doesn’t spring back at all, it may be over-proofed.
After the first rise, the dough is usually punched down to release excess gas and then shaped. Shaping creates tension on the surface, which helps the loaf hold its form. A second rise, or proof, follows. This step can take 30–60 minutes. The dough should be slightly less than doubled; over-proofing can lead to a collapse in the oven, while under-proofing results in a dense loaf. The poke test is useful here as well. For a more controlled process, you can retard the dough in the refrigerator overnight; this slows fermentation and develops flavor. Cold proofing is flexible but requires planning.
Environmental factors such as altitude and humidity can affect proofing times. In higher altitudes, dough may rise faster due to lower air pressure, so you might need to reduce yeast or rise time. In humid conditions, dough may absorb moisture from the air and become stickier, requiring less liquid. Keep notes on your conditions and adjust gradually. Proofing is a skill that improves with practice, and observing the dough rather than strictly following times will yield better results.
Baking and Troubleshooting Common Issues
Preheat your oven thoroughly before baking, often to 375–425°F depending on the recipe. A baking stone or steel can help create a crisp crust by providing intense, even heat, but a sturdy baking sheet works for most beginners. Steam is another factor: professional ovens inject steam to keep the crust moist during the initial rise, allowing for maximum expansion. At home, you can create steam by placing a pan of hot water on the lower rack or spritzing the oven walls with water just before closing the door. However, be cautious with spritzing, as it can damage oven surfaces. Alternatively, baking in a Dutch oven with the lid on for the first 20 minutes traps steam and then removing the lid to brown the crust is a popular method.
Baking times vary based on loaf size and shape. A standard loaf might take 30–40 minutes. The internal temperature should reach about 190–210°F for most yeast breads. An instant-read thermometer is a reliable tool. If you don’t have one, tap the bottom of the loaf—it should sound hollow. After baking, cool the bread on a wire rack to prevent sogginess. Slicing too soon can release steam and make the crumb gummy. Cooling also allows the starches to set, improving texture.
Despite best efforts, issues can arise. Here are common problems and possible causes:
- Dense or heavy loaf: Often due to under-proofing, insufficient kneading, or old yeast. Check yeast activity and ensure dough rises adequately.
- Gummy texture: May result from over-proofing, under-baking, or cutting too soon. Verify internal temperature and cooling time.
- Flat loaf: Could be from over-proofing, too much liquid, or weak flour. Adjust hydration or try a higher-protein flour.
- Large holes: Sometimes desirable, but if excessive, it may indicate under-kneading or uneven shaping. Focus on shaping technique.
- Crust too dark or too pale: Oven temperature variations. Use an oven thermometer to verify and adjust baking time or temperature.
These are general guidelines; the exact cause may be a combination of factors. Changing one variable at a time helps isolate the issue. For instance, if the loaf is dense, try extending the proof time next batch and see if that improves the outcome. Keep a baking log to track changes and results. Remember that flour, yeast, and even the water in your area can vary, so adaptation is part of the process.
Developing Your Bread Baking Skills
Baking bread is a skill that develops over time. Each loaf provides information about how ingredients and conditions interact. Beginners often start with a simple white bread recipe, then gradually explore whole grains, sourdough, or enriched doughs. The key is to pay attention to the dough’s feel and appearance, not just the clock. External factors like kitchen temperature and humidity can shift results, so learning to adjust on the fly is valuable. Joining a community of home bakers, either online or locally, can offer support and ideas.
While a reliable recipe is a good starting point, understanding the underlying principles allows you to troubleshoot and innovate. For example, if you want a softer crust, you might brush the loaf with butter after baking; for a crispier crust, you might increase steam during the initial bake. These adjustments are part of the creative process. However, it’s important to note that no single technique guarantees a perfect loaf every time, as many variables are beyond control. Patience and observation are your best tools.
As you gain experience, you may find that baking bread becomes a meditative and fulfilling practice. The process connects you to a tradition that spans cultures and centuries. Whether you bake for yourself, your family, or friends, the effort is rewarded with fresh, flavorful bread that cannot be matched by store-bought versions. Remember to enjoy the journey and celebrate each loaf as a learning experience. With time and practice, you’ll develop an intuitive sense for what works in your kitchen.